


Saluuut, we come back for a Super Tutorial Free Couture Zero Waste: What can be done with His fabric falls ? !
Today I show you How to sew a reversible bob All cute step by step.
I put the boss's link to you just here ! This is a basis that you can obviously modify, that it is exactly as you dreamed!
I advise you to measure your head turn to adjust if necessary.
Also note that depending on the thickness of the fabric you will need more or less ease for the head of the head.
Add about 1.5cm of ease for normal fabrics (like jeans, velvet, etc.) and add about 2cm more for heavier tissues.
Equipment for sewing the bob with your fabric falls
-or 50cm of fabrics if you make a bob with the same fabric on both sides or 2 fabrics around 25cm.
- scissors
-Pins
-Son to sew
The stages of the couture tutorial

2x part 2 in the 2 fabrics and 2x part 3 in the 2 fabrics.
2ND STEP :

Take the pieces cut in the room 2 and sew locations on the two rooms of the same fabrics on the ends 1cm from the edge. (See orange traits in the photo). Then do the same with the pieces cut in room 3.
Do not forget to open and crush the seams for a clearer rendering.
Step 3:

We will assemble the visor part and the upper part of the bob.
Sew the part 2 Fabrics1 in room 3 fabrics 1.
Pin the whole Tour Place against the place by placing the seams face to face well to have a beautiful fitting! Then sew 1cm from the edge.
Repeat the same operation with parts 2 and 3 of fabrics 2!

Do not forget to open and crush the seams for a clearer rendering.
Step 4:

We will now assemble the remaining pieces, so the circles in the bob.
You pin the piece Fabrics 1 in the Bob Fabrics 1 and the same for the fabrics 2, always a place against the place then sew 1cm from the edge.
Step 5:

The next step is to sew the two parts of the bob between it, place in place. So we are going to pin everything around by aligning the seams once again and leaving around 10cm open to be able to return the bob just after. Once pinned to sew 1cm from the edge.
Step 6:

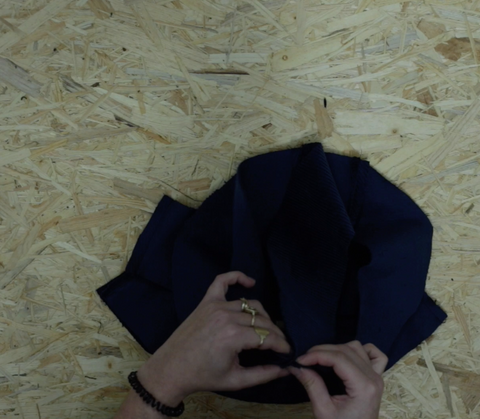
After sewing, we're going to come and return the bob with the opening we have left.

Once the bob has been turned over, take care of the couture of the tower and place everything by hand to have a uniform tour.
Step 7:

We will now close the hole which was used to return the bob. We're going to enter the sewing cm inside and we're going to pin.
Once the hole is well pinned we will come to sew 4mm from the edge all over the Tour du Bob. (if you are more comfortable with the pinning of all around do not hesitate!))
The result: a nice reversible bob sewing in your fabric falls!

And here is your finished bob!
You can obviously change the topstitching as you wish! It's your bob in magnificent fabrics!
If you are wondering what to do with the latest centimeters of Your coupons of 3 meters of fabrics, you can also sew:
- a darling (see our free tutorial)
- scarf (see our free boss)
- A reversible top butterfly for summer (sees our free tutorial)
Did you like this article? Save it on Pinterest :)


Comments
Hâte de le faire pour mon mari cette été.
Bonjour,
Merci pour ce partage et ce tuto !
J’aimerai bien me lancer, malheureusement le lien vers le patron ne fonctionne pas, est-ce que vous pourriez le repartager, s’il vous plaît ?
Merci beaucoup
Je le trouve très beau je voudrais bieb avoir le tutoriel svp merci
J’adore, j’aimerais avoir un patron du bob,et autre chouchou.
Merci de votre compréhension cordialement 😊
Ce Tuto est très facile et permet de faire des bobs sympas
Ce Tuto est très facile et permet de faire des bobs sympas